Friday, February 26, 2010

Lemon Chicken Piccata


I debuted this recipe in my kitchen on February 14, 2008 as a special Valentine's Day dinner for (my then boyfriend) Hirsh. I had gotten the recipe from my mom and while it was relatively simple, it still had a "fancy" quality about it, so it seemed perfect for our special Valentine's Day dinner. Hirsh loved the dish so much that it has gone from "fancy dinner" to "got home late after working out" dinner. It is quick and easy to make, but somehow always manages to make my kitchen look like a cyclone hit it (mostly from the flour everywhere)... but it is always worth the cleaning up.

Lemon Chicken Piccata
2 boneless chicken breasts
Flour
Salt
Pepper
1 lemon, cut into 4 slices, rind removed, plus few slices for garnish
1/2 C white wine
2 tsp Butter (I use Smart Balance since it is nondairy and has less fat)
2 tsp olive oil

1. Flatten chicken breasts between two sheets of plastic wrap until about 1/4 inch thick.
2. Dredge in flour seasoned with a few shakes/ twists of salt/ pepper and shake off the excess.
3. Heat skillet with butter and oil just over medium heat until fats are shimmery.
4. Add chicken to skillet, cooking 4-5 minutes for each side until chicken is golden and cooked through.

5. Add wine to the skillet along with lemons and a bit more flour to thicken the sauce. Stir chicken breasts in the sauce for a few minutes until the sauce reduces.
6. Serve with your vegetable and starch of choice, garnished with a fresh slice of lemon!

Difficulty: Easy-Medium
Hirsh's Rating: 9
Debbie's Rating: 9

Tuesday, February 23, 2010

Zucchini Bread


I had a meeting with my dissertation committee this morning to update them on my progress. I presented my current results, discussed my proposed studies as well as my timeline for graduation (hopefully soon!) I decided that it would be a great idea to bring something homemade to the meeting to get my committee members in a good mood for my presentation, so I made zucchini bread (my mom's recipe). It was really tasty (I had a piece after the meeting) and my committee members seemed to like it! They were also impressed that I was both a PhD student and a good baker! The meeting went very well, so I will call the bread a success!

Zucchini Bread
(makes 2 loaves)

4 eggs
1 3/4 C sugar
1 C oil
3 1/2 C flour
1 1/2 tsp baking soda
3/4 tsp baking powder
1 1/2 tsp salt
1 tbsp cinnamon
1 tbsp vanilla
2 C grated zucchini (1 zucchini= about 1 cup)
1 C walnuts (optional...I usually leave nuts out when I am baking for other people)

1. Beat eggs slightly in an electric mixer.
Normally this step would not require a picture, but for the first time ever I got a DOUBLE YOLK EGG! It was crazy. I did some reading online and found out that they are relatively uncommon in supermarket eggs but common in nature. I also read that it was good luck, so I decided to include it in the bread.

2. Add sugar and oil to eggs and combine.
3. In a separate bowl, combine all dry ingredients.
4. Add dry ingredients slowly to wet ingredients, mixing to combine.
5. Grate zucchini in food processor using grating blade followed by regular blade. Measure one cup and then press out excess water.
6. Add zucchini, vanilla and (optional) nuts to batter.
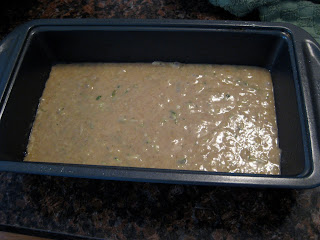
7. Spread in 2 greased 9x5 loaf pans and bake at 350 for one hour.

8. Let cool for 10 minutes, then turn out of pan and cool completely.

Difficulty: Easy
Debbie's Rating: 9
Committee's Rating: Well, I didn't tell them about my blog, so I don't have a number, but there were sufficient "mmm's" and second pieces taken to know that they liked it.


Sunday, February 21, 2010

Spinach Lasagna and Homemade Garlic Bread

We had Marie and Victor over on Saturday night in honor of Marie's upcoming birthday, so I decided to make spinach lasagna. I don't usually make it since it makes a lot, but it is an easy dish for company since it requires very little last minute attention. I got the recipe from my mom. I also made homemade garlic bread. My brother stole this recipe from the restaurant he used to work for as a teenager in Pittsburgh (Bentley's on Wilkins avenue...if anyone remembers). It definitely beats store-bought garlic bread any day and is very easy to make.

Spinach Lasagna
32 oz part-skim ricotta
2 cups shredded part-skim mozzarella, divided
(you can use whole milk versions of both cheeses for richer lasagna, but I try to keep the fat content down by using part skim and the taste is still good)
1/2 C parmesan, divided
2 eggs
2 jars marinara sauce
16 pieces Barilla flat, no-cook lasagna noodles
2 packages frozen chopped spinach.

1. Preheat oven to 375 degrees.
2. Combine ricotta, eggs, 1 C mozzarella and 1/4 C parmesan.
3. Defrost and drain 2 boxes of spinach.
4. Gather all of your ingredients for layering.

5. In a 9x13 baking dish or lasagna pan, spread one cup of sauce, follow by 6 lasagna noodles (minimize overlap), half of the cheese and half of the spinach.

6. Repeat sauce-noodle-cheese-spinach layer and top with 4 lasagna noodles and 2 cups of sauce.
7. Bake for COVERED for 1 hour at 375. (I forgot to cover it and the top layer got a little toasty!)
8. Add remaining cheeses (1 C mozzarella and 1/4 parmesan) and bake UNCOVERED for an additional 10 minutes.
9. Let rest a few minutes before serving. Serves 6-8.

Difficulty: Easy
Guest Raters- Marie and Victor: 9.5
Debbie's Rating: 8- next time I will remember to cover it in the oven!
Hirsh's Rating: 8.5

Homemade Garlic Bread
1 loaf of bread of your choice- works well with sourdough, italian and ciabatta
Butter spread like smart balance or country crock
Oregano
Garlic Powder
Parmesan

1. Cut bread into thick slices and put on foil lined baking sheet.
2. Put butter spread in microwave for 10 seconds to soften.
3. Add a few shakes each of garlic powder and oregano to the butter and combine.
4. Spread a thin layer of seasoned butter on the bread and top with parmesan.

5. Bake at 350-400 (depending on what else you have in the oven- 375 is best) for 6 minutes.

Difficulty: Easy
Hirsh's Rating: 9
Debbie's Rating: 10

Thursday, February 18, 2010

Broiled Salmon with Citrus Glaze

I was looking for a simple way to prepare salmon, and came across this Alton Brown recipe. Originally, I was just going to get regular Atlantic salmon even though the recipe called for Sockeye salmon, but our grocery store happened to have Alaskan Sockeye salmon on sale this week! Sockeye, also called "red salmon" is wild Pacific salmon and is supposed to have much more flavor than farmed Atlantic salmon. I'm sure this recipe could be made with Atlantic salmon as well and will probably do that next time.

Broiled Salmon with Citrus Glaze
1 piece of salmon about 0.8 lbs (enough for 2 people)
1/6 cup brown sugar (eyeball it...I halved the recipe)
Zest of one lemon
3/4 tsp kosher salt
1/4 tsp fresh ground black pepper

1. Line baking pan with aluminum foil and place salmon on the foil.
2. Put sugar, zest, salt and pepper in the small bowl of a food processor and process until combined.
3. Spread evenly on fish and let sit for 45 minutes at room temperature.

4. After 45 minutes, you will see that a glaze has formed. Transfer fish to a fresh piece of foil and discard glaze on foil (if you don't, the glaze will burn).

5. Position oven rack 5-6 inches from broiler and preheat broiler for 2 minutes.
6. Broil fish for about 8 minutes until fish flakes and internal temperature is about 135.
7. Let fish rest uncovered for 5 minutes before serving.

Difficulty: Easy
Hirsh's Rating: 8.5
Debbie's Rating: 8.5

The glaze was really good- a subtle sweet citrus flavor, just enough to complement the fish. It was also fun to try wild salmon, but our store rarely has it so we'll try it with regular salmon next time.

Monday, February 15, 2010

Pan Seared Filet with Mushroom Wine Sauce


Every year, I make Hirsh a special Valentine's Day dinner. I always like to try something new and fancy and this year, I decided that I would make filet mignon. I have been watching a lot of Alton Brown's show "Good Eats" and he did a show on searing. It seamed like a great way to prepare filet, so I did a bit more research, found a sauce online and went for it. For my first time preparing filet, I would call it a success...but there are definitely a few things I would change next time to make it even better. Since I was making it a surprise dinner for Hirsh and had kicked him out of the kitchen, it was a bit stressful to prepare, but I'm sure with an assistant it would go much smoother. I served the filet with long grain and wild rice and broccolini (technically a cross between broccoli and chinese kale, but I think of it as fancy broccoli).

Pan Seared Filet
2 1 1/2 inch filet mingon steaks (I got mine at Trader Joe's)
Olive oil
Kosher salt
Pepper

1. Preheat oven to 450 with baking sheet covered with aluminum foil in the oven.
2. Bring steaks to room temperature and dry with paper towels.
3. Spread a thin layer of olive oil on each side and generously salt and pepper the steaks, pressing seasonings into the steaks with your hands.
4. Heat 10 inch skillet over medium high heat until very hot. Cast iron is the best, but I used my non-stick.
5. Add steaks to pan and sear on each side for 2 1/2 minutes. Do not disturb except for turning once with tongs.

*This is when things started to get crazy. I had read about smoking issues, so I put our oven vent on high, but that was not enough. Our smoke detector (in the living room) starting going off and we had to open several windows until the searing was over. Then I looked again at my Alton Brown book and saw that it said that you should probably remove the batteries from your smoke detector when you sear meat. Good to know!
6. Transfer steaks to hot baking sheet and bake an additional 8 minutes for medium (less for more rare).
7. Let meat rest for 5 minutes, tented with foil.
8. Serve topped with mushroom wine sauce.

Mushroom Wine Sauce
2 tbsp of butter (I used smart balance to keep it non-dairy)
1 tbsp olive oil
1 clove of garlic, chopped
1/2 tbsp fresh parsley, chopped
1/c C sliced mushrooms
1/2 C dry red wine (I used cabernet sauvignon)

1. Melt butter and olive oil in the pan.
2. Add garlic and parsley stirring until garlic is lightly browned.
3. Add mushrooms and wine, cooking about five minutes until mushrooms are soft.
4. Pour immediately over steak and serve.

Difficulty: Hard!!
Hirsh's Rating: 9
Debbie's Rating: 8.5 for taste, 7 for turning out like it should have!

What I would do differently next time:
The steak was very tender and delicious and the sauce complemented it well. But it turned out more medium-well than medium as I had hoped. I think I was so worried about getting everything hot enough that I overdid it a little bit. I would preheat the pan for less time on lower heat to get a less severe sear. I would also probably bake it for only 6 minutes after searing. I started the mushroom sauce a little too early, so it cooked too long, making the mushrooms turn red from the wine...so I would cook it a little less time. And finally, I would enlist help! With the steak, sauce, rice and broccolini all going at the same time, it was a lot to handle. So if you are going to try this alone, just be ready to be exhausted by the time dinner is on the table!

Valentine's Shortbread Cookies


My mom always used to make Valentine's Day packages for me and my dad, and I always looked forward to her Valentine's day shortbread cookies. I decided to make them this year for the first time as the dessert for our special Valentine's day dinner. They turned out really well, and although I never buy dessert, Hirsh was convinced they were store-bought since they were "so perfect." Of course, with a different cookie cutter, they could be made for any holiday and would be really great for Christmas/ Hanukah cookies.

Valentine's Shortbread Cookies
1 C butter
3/4 C powdered sugar
1 tsp vanilla
2 C flour
1/2 tsp salt
6 oz chocolate chips

1. Beat room temperature butter with sugar and vanilla until light and fluffy.
2. In a separate bowl, sift flour and salt together.
3. Blend flour into butter until well mixed.
4. Form into 2 disks, cover in wax paper and refrigerate for at least 3 hours.
5. Let dough come to room temperature. Add a little water to the surface if it seems too hard.
6. Roll out on floured board with floured rolling pin to about 1/4 inch thick.
7. Cut out in heart shapes and place on cookie sheet.

8. Bake at 300 degrees for 18-20 minutes. The cookies should be lightly browned.

9. Melt chocolate in double boiler (or a glass bowl over boiling water if you don't have one) and leave over hot water.
10. "Frost" each cookie with chocolate and add sprinkles (I got these adorable heart sprinkles from Williams Sonoma.)
11. Refrigerate on wax paper to set chocolate.

If you have leftover chocolate, you can make all sorts of chocolate covered treats. I had graham crackers and pretzels around, so I made some of those! Marshmallows work great too.


Difficulty: Hard
Hirsh's Rating: 9
Debbie's Rating:10

Although these were very time and labor intensive, I will definitely make them again!

Monday, February 8, 2010

Spicy Chicken and Cashew Stir Fry


Spicy Chicken and Cashew Stir Fry is Hirsh's favorite meal that I make. I got the original recipe from my mom and we have adapted it to use vegetables that we like (okay that Hirsh eats), but you could really use almost any vegetables you like or have in the fridge. The sauce is easy to make with pantry staples and can be made more or less spicy to suit your taste. You could even leave out the chicken all together and make a vegetarian stir fry. After all the chopping is done, it only takes about 15 minutes to prepare so it is great for weeknights.

Spicy Chicken and Cashew Stir Fry

2 boneless skinless chicken breasts, cubed
2 cups of vegetables, cut in small pieces-- we usually use broccoli, sugar snap peas and baby corn, but red peppers, mushrooms and water chestnuts are also great.
1/3 cup cashews
Oil

The sauce:
3 tbsp low sodium soy sauce
2 tsp corn starch
2 tbsp dry sherry (cooking wine)
1 tsp powdered ginger
1 tsp sugar
1/2 tsp salt
1/2 tsp crushed red pepper flakes

1. Stir soy sauce and corn starch in small bowl.
2. Stir in sherry, ginger, sugar, salt and red pepper flakes, Set aside. If you want to make it more or less spicy adjust the ginger and red pepper flakes- that's where it gets its kick.
3. Preheat 12 inch non-stick frying pan with 1 tsp or so of oil.
4. Saute veggies until crisp tender, remove to a plate.

5. Add another tsp of oil, saute chicken until cooked through and lightly browned.
6. Stir sauce into chicken and quickly add veggies and cashews. Stir until evenly coated.

7. Serve over rice and enjoy! Makes about 2 dinner portions and 1 lunch portion (mmm...leftovers).

Difficulty: Easy
Debbie's Rating: 9
Hirsh's Rating: 10


Ghirardelli Brownies


I was supposed to make brownies for a super bowl party that Hirsh and I were going to that ended up getting cancelled due to the snow. Luckily, our neighbors had us over instead (in 35 inches of snow, down the street was about as far as we could go!). I brought Ghirardelli chocolate brownies and they were delicious! This will always be my go-to brownie recipe.

Ghirardelli Brownies
2 eggs
3/4 C sugar
1 tsp vanilla extract
1/2 C (1 stick) butter, melted
3/4 C Ghirardelli Sweet Ground Chocolate and Cocoa (comes in a gold tin)
2/3 C flour
1/4 tsp baking powder
1/4 tsp salt
1 cup 60% Ghirardelli Cacao Bittersweet Chocolate Chips (you can use regular chocolate chips, but these make the brownies extra delicious)

1. Preheat oven to 350 degrees.
2. Stir eggs with sugar and vanilla by hand, using a spoon.
3. Add melted butter and stir.
4. In a separate bowl, sift together ground chocolate with flour, baking powder and salt, mix to combine.
5. Add dry ingredients to wet ingredients until fully combined.
6. Stir in chocolate chips.
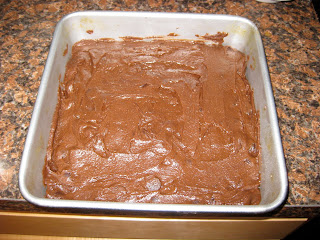
7. Spread into a greased 8x8 or 9x9 pan.

8. Bake about 25 minutes until a toothpick comes out clean.
9. When cool, cut into 16 squares and enjoy!

Difficulty: Easy
Debbie's Rating: 10
Hirsh's Rating: 9.5


Saturday, February 6, 2010

Vegetarian Spaghetti Pie


One of our favorite meals is baked ziti....the combination of noodles and sauce with mozzarella, ricotta and parmesan cheese just hits the spot. So it seemed logical to try spaghetti pie, which is based on the same main ingredients. My friend Kevin gave me this recipe and I modified it to use marinara sauce instead of traditional meat sauce.

Vegetarian Spaghetti Pie
6 oz cooked spaghetti
Butter to coat pie plate
1/3 C Grated Parmesan cheese
2 eggs, beaten
1 C ricotta or cottage cheese (I used 3/4 C ricotta and 1/4 C cottage cheese since that's what I had around, both were 2%)
Marinara sauce
1/2 C mozzarella cheese

1. Preheat oven to 350 degrees.
2. Butter glass 9 inch pie plate
3. Combine eggs, parmesan and cooked spaghetti
4. Put spaghetti in pie plate to form "crust"

5. Spread ricotta as "filling".
6. Top with marinara sauce to cover entire pie, being careful to get all the way to the edges.
7. Bake for 20 minutes.
8. Add mozzarella cheese and bake 5 additional minutes.
9. Cut into wedges and enjoy! Makes 4 hearty servings.

Difficulty: Easy
Hirsh's Rating: 8.5
Debbie's Rating: 8

Despite having the same ingredients as baked ziti, it had a really unique taste and the spaghetti "crust" was really tasty! We will definitely make it again!


Tuesday, February 2, 2010

Roasted Red Pepper Hummus


As soon as I got my food processor as a wedding gift, I knew I wanted to try making my own hummus. I got a basic recipe from my cousin Marcy and started experimenting. Marcy explained to me that it is hard to write a recipe like hummus down because you just add a little of this and that until you have the flavor you want. Hummus has been quite an adventure for me. Because I wasn't writing my recipe down, I ended up with something different every time and while all were good, they were always a little to garlic-y or lemon-y or water-y. Mostly, I was frustrated that I could not replicate the texture of my favorite store bought hummus (Sabra) no matter how long I processed the chickpeas. I found a few tricks online to get it smoother (see secrets 1 and 2 in the recipe) and optimized my seasonings...and voila! My finalized roasted red pepper hummus recipe.

Roasted Red Pepper Hummus
1 15.5 oz can Goya Chickpeas
Juice of 1 lemon
1 clove of garlic, minced
1 tbsp tahini
1/2 tsp kosher salt
2 tbsp water
Olive oil
1/2 roasted red bell pepper

1. Drain and rinse chickpeas with cold water.
2. Secret #1: Remove skins from chickpeas. You can do this by pinching them gently. They will pop out of their skins. Although this step is time consuming, it will make the hummus very smooth and is worth it!

3. Put chick peas in food processor and pulse several times until coarsely ground.
4. Add lemon juice, minced garlic, tahini (if you have trouble finding it in the store, my store has it next to the olives...) and kosher salt. Pulse a few times to combine into a thick paste.
5. Add 2 tbsp water to thin the hummus.
6. Secret # 2: Add a drizzle or two of olive oil through the ingredient shoot WHILE PROCESSOR IS ON. Adding the olive oil in this way creates an emulsion which whips up the hummus. You should see it increase in volume slightly.

7. Add half of a roasted red bell pepper in small strips.* Pulse a few times to chop the pepper and combine.
8. Store in the refrigerator for up to 2 weeks. Makes about 2 "store containers" worth of hummus. Great with pita or wheat thins (Hirsh's favorite).

Difficulty: Medium
Hirsh's Rating: 9.5
Debbie's Rating: 10 (I have FINALLY nailed my hummus recipe!)

* If you have never roasted a pepper before, here's how you do it. (Thanks to Marcy, again for teaching me!)

Roasted Red Pepper
1. Set your oven to broil
2. Wash pepper and put on foil-lined baking sheet.
3. Put pepper 3-5 inches under broiler and wait until it starts to blacken (about 5-10 minutes)
4. Rotate the pepper and repeat until all sides are blackened.

5. Take out of the oven and store in a ziplock bag for at least an hour until the pepper has cooled.
6. Peel off the skin with your hands (this should be easy) and get rid of the seeds.
7. Cut into strips and add to hummus, pasta, sandwiches, etc.
Note: Roasting red peppers makes your kitchen smell really good!

Monday, February 1, 2010

Spaghetti with Homemade Meat Sauce


Hirsh and I eat a lot of pasta. It's a quick, convenient weeknight meal which is perfect when we both get home late. While I really like Barilla jarred sauce, I was getting a little bored with it and decided it would be fun to make homemade meat spaghetti sauce. Since this recipe made a lot of sauce, I measured out portions for 2 (1 1/2 cups each) and froze it in ziplock containers for later use. The recipe is modified from my Betty Crocker cookbook.

Homemade Meat Sauce
2 28 oz cans diced tomatoes with italian seasoning
1 6 oz can tomato paste
1 medium onion, chopped
6 cloves garlic, finely chopped
1 tbsp olive oil
2 tsp sugar
1 1/2 tsp dried basil leaves
1 tsp dried oregano leaves
1/2 tsp pepper
1/2 tsp salt
1/2 C water
1 lb ground beef

1. Brown ground beef in frying pan until beef is in small pieces and completely cooked through. Make sure to remove all the liquid fat! Set aside cooked meat.
2. Saute onion and garlic in olive oil in 6 qt pot until tender.
3. Add the rest of the ingredients and cooked ground meat to the pot and stir.

4. Boil and then reduce to medium low heat.
5. Simmer for 1 hour stirring occasionally.
6. After one hour, let cool slightly and serve or portion into containers. Total yield was 7 1/2 cups. (Note: 1 1/2 C is good portion for two people. It will stay fresh in fridge for 2 weeks or freezer for 1 year.)

7. Serve over cooked spaghetti!

Difficulty: Easy
Debbie's Rating: 10
Hirsh's Rating: 9
It's a good thing we liked it because have four more portions to go!